7-Day Kilimanjaro Climb Guide 2026–2027 | Routes, Itinerary, Packing Tips & FAQs
Mount Kilimanjaro - Tanzania Trekking Package More > 1 Group
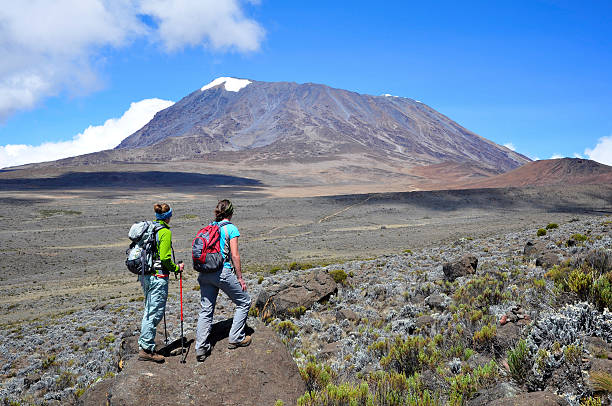
Our 7-Day Kilimanjaro Climb 2026–2027 is designed for trekkers who want the best combination of acclimatization, scenery, and summit success. Whether you choose the Machame, Lemosho, or Rongai Route, this itinerary provides gradual altitude gain, professional guiding support, delicious meals, and well-organized camp setups. Expect diverse landscapes—from lush rainforest and moorland to alpine desert and glacier views—as you make your way to Uhuru Peak, 5,895m, the Roof of Africa. This route is ideal for both first-time trekkers and experienced hikers looking for a safe, enjoyable, and successful summit.
Climbing Mount Kilimanjaro is a remarkable achievement, and a 7-day trek offers an optimal balance between acclimatization and summit success. This extended itinerary allows your body to adjust to the altitude, significantly enhancing your chances of reaching the summit.
🗓️ 7-Day Kilimanjaro Itinerary
Day 1: Arrival in Tanzania – Pre-Climb Briefing
Upon arrival at Kilimanjaro International Airport (JRO), you’ll be transferred to your hotel in Moshi/Arusha where you will meet your mountain guide for a detailed briefing. Your gear will be checked to ensure you have all necessary equipment, and missing items can be rented before the climb. Enjoy dinner and rest to prepare for the trek ahead.
Day 2: Trek Starts – Gate to First Camp
After breakfast, you’ll drive to the starting gate of your chosen route (Machame, Lemosho, or Rongai). Registration is completed with park authorities before you begin your ascent through the dense and humid rainforest zone. The trail is filled with exotic trees, moss, and wildlife such as Blue Monkeys. By late afternoon, you’ll arrive at the first camp for dinner and overnight.
Day 3: Climb to Shira Plateau or Kikelewa – Heath Zone
Today’s hike takes you out of the rainforest and into the heath and moorland zone, featuring giant heathers, volcanic rocks, and expanding views across the mountain. The air becomes thinner as you climb steadily toward the Shira Plateau or Kikelewa region depending on your route. Upon arrival at camp, you’ll have time for an acclimatization hike before dinner.
Day 4: Acclimatization Day – Lava Tower or Mawenzi Ridge
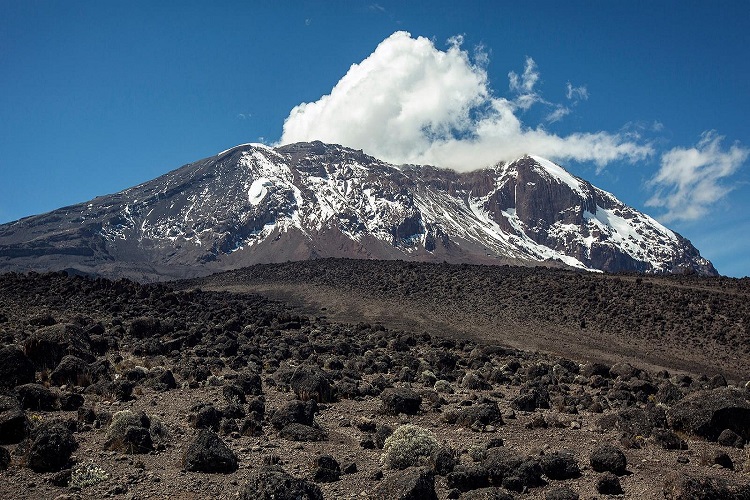
This important day focuses on acclimatization. You’ll trek higher to Lava Tower (4,600m) on Machame/Lemosho or Mawenzi Ridge on Rongai, allowing your body to adapt to altitude through the “climb high, sleep low” method. After exploring the high-altitude features and enjoying lunch, you’ll descend to your lower camp at Barranco or Mawenzi Tarn for rest.
Day 5: Barranco Wall – Trek to Karanga Camp
You’ll begin the morning by climbing the famous Barranco Wall, a steep but non-technical ascent offering spectacular views of the southern glaciers. The route then continues along a series of ridges and valleys, providing scenic views of Kibo Peak. You’ll reach Karanga Camp in the afternoon, where you’ll rest and hydrate as part of your acclimatization preparation.
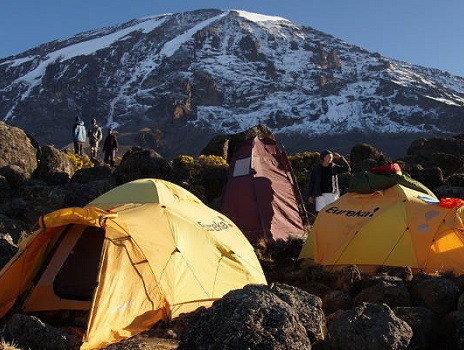
Day 6: Karanga to Barafu Base Camp – Summit Preparation
A gradual climb leads you to Barafu Base Camp, the final stop before the summit. The landscape becomes more rugged and windswept as you enter the Arctic zone. After an early dinner, your guide will brief you on summit procedures. You’ll sleep early, and prepare mentally and physically for the long summit night ahead.
Day 7: Summit Day – Uhuru Peak & Descent
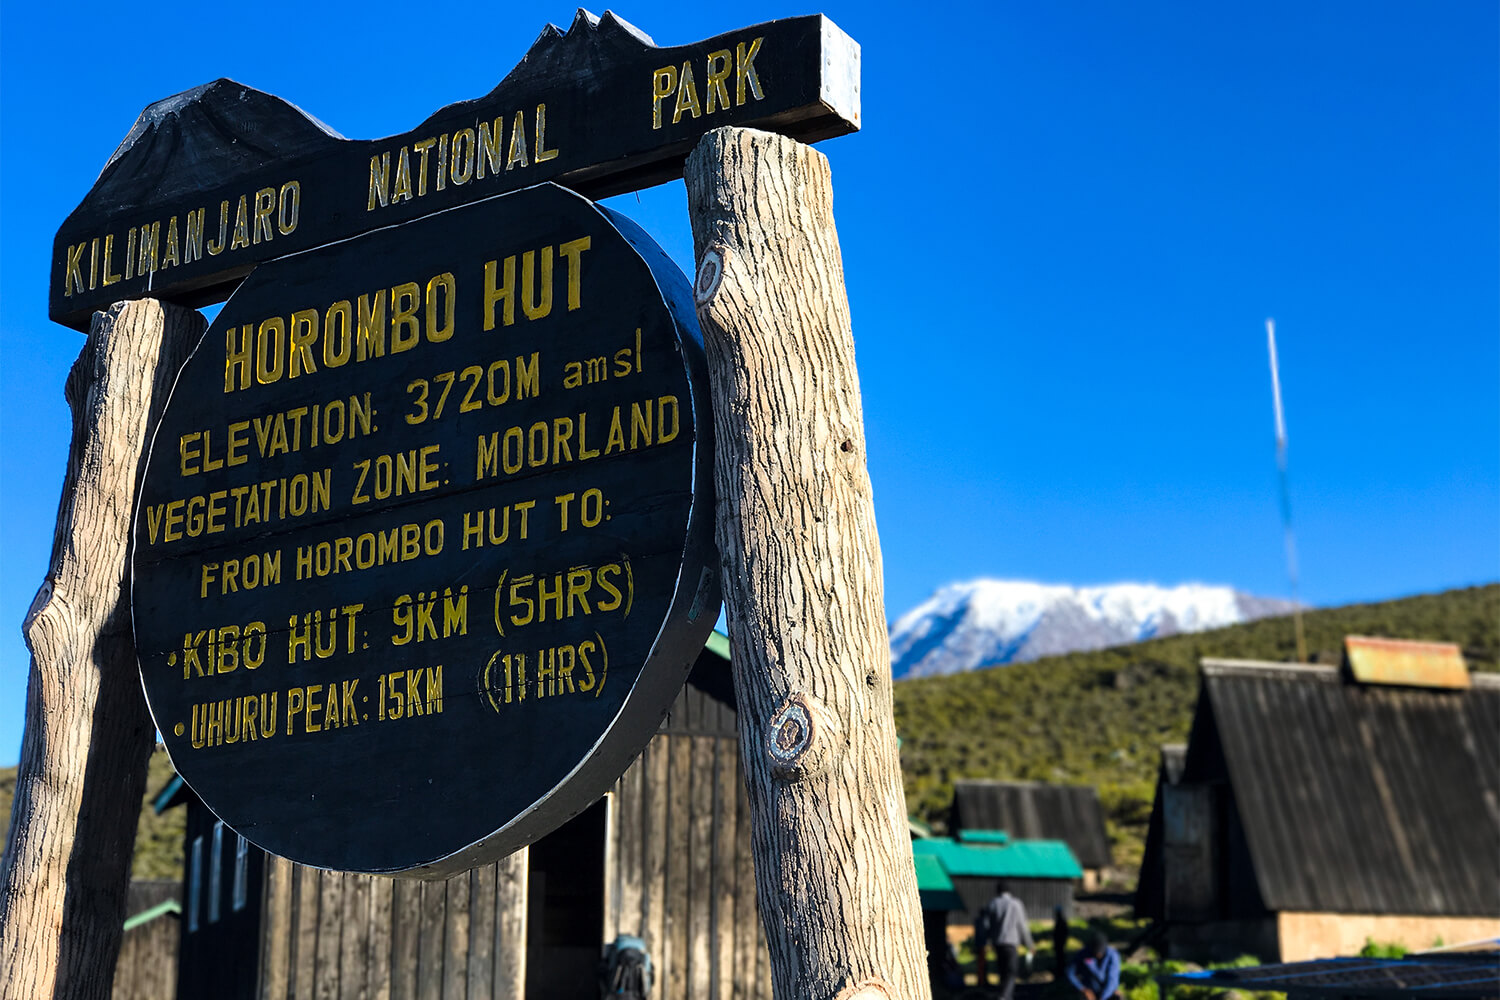
Just before midnight, you begin your ascent toward Uhuru Peak. The climb is slow and steady as you trek in cold night air under a sky full of stars. After reaching Stella Point or Gilman’s Point, you push toward Uhuru Peak (5,895m), arriving at sunrise for unforgettable views. After celebrating and taking photos, you’ll descend to Barafu for breakfast, then continue down to Mweka or Horombo Camp for overnight.
Day 8: Final Descent – Certificate Ceremony & Transfer
After breakfast, you’ll make your final descent through the rainforest to the exit gate. Here you’ll receive your official Kilimanjaro climbing certificate for reaching Stella Point, Gilman’s Point, or Uhuru Peak. Your driver will transfer you back to the hotel for a hot shower, rest, and celebration dinner.
Inclusions & Exclusions
Inclusions
- All Park Entry Fees
- Rescue Fees
- Professional Mountain Guide
- Porters and Cook Services
- All Meals During the Trek
- Filtered Drinking Water
- Camping Equipment (Tents, Sleeping Mats)
- Transfers to/from the Gate
- Airport Transfers (for Kilimanjaro)
- Government Taxes
- First Aid Kit
Exclusions
- Personal Trekking Gear (Clothing, Boots)
- Tips for Guides, Cook, and Porters
- Travel Insurance
- Meals Not Specified in the Itinerary
- Visa Fees
- Items of Personal Nature (Laundry, Drinks)
- Optional Tours Before/After the Trek
*The price depend on your Program
Build Your Trip
Booking Form
OR
Ready to book your 7-Day Kilimanjaro Climb? Contact us today for quick support and personalized planning. prehemytours@gmail.com +255 741 157 075 . Your adventure with Prehemy Tours begins with one message—let’s make it happen!
Safari Adventure
Book NowJoin us for an unforgettable safari experience in Tanzania. Limited spots available!
- $1,200
Kilimanjaro Climb
Reserve Your SpotConquer Mount Kilimanjaro with our experienced guides. Offers end soon!
- $1,500
Beach Escape
Plan Your TripRelax on the pristine beaches of Zanzibar with our exclusive tour packages!
- $1,000
🎒 Detailed Kilimanjaro Packing List for 2026–2027 Climbs (Complete Guide)
Packing the right gear is essential for a successful 7-Day Kilimanjaro climb. Temperatures range from humid rainforest to freezing summit winds — this guide lists clothing, technical equipment and accessories recommended by experienced mountain guides.
👚 Clothing — Layering System for All Kilimanjaro Zones
Use a layered clothing system so you can easily add or remove insulation as conditions change. Each numbered item below includes what to look for and why it matters.
-
Waterproof jacket & trousers
A durable, fully waterproof outer layer (GORE-TEX or equivalent) protects from heavy rainforest rain and high-altitude wind. Choose breathable fabric and taped seams to stay dry without overheating. -
Fleece jacket & warm sweater
Midlayers provide essential insulation. Pack at least one warm fleece (weight: mid/loft) or a heavyweight jumper for evenings and higher camps. -
Thermal base layers
Lightweight, moisture-wicking base layers (top & bottom). Carry at least two sets so you can rotate dry clothing and avoid hypothermia risk on summit night. -
Hiking pants
Quick-dry trekking pants that are breathable. Avoid denim. Convertible zip-off pants add flexibility for changing temperatures and terrain. -
Down jacket (very warm)
A high-fill (600–800) down jacket with hood is essential for summit night when temperatures drop well below freezing. -
Warm gloves & mittens
Bring thin liner gloves plus insulated mittens. Liners give dexterity; mittens provide maximum warmth during the summit push. -
Wool socks (3–5 pairs)
Merino wool socks wick moisture and resist odor. Multiple pairs let you swap into dry socks each day to prevent blisters and frostbite risk. -
Warm hat, balaclava, or buff
Insulate your head and face during summit night. A buff is versatile for sun, wind and cold protection.
🥾 Gear — Technical Equipment You Must Bring
Technical gear protects you on rough trails and through changing conditions. Make sure key items are high quality and tested before the trip.
-
Waterproof hiking boots
Sturdy boots with ankle support and a grippy sole. Break them in well before the climb to avoid painful blisters. -
Gaiters
Protect boots and lower legs from mud, scree, snow and rock debris — especially useful during wet or snowy sections. -
Trekking poles
Adjustable poles reduce stress on knees, help with balance and improve pacing on steep ascents and descents. -
Headlamp + extra batteries
A reliable headlamp is critical for the midnight summit push — bring spare batteries and test the lamp in cold conditions. -
UV-protected sunglasses
High-quality sunglasses (category 3–4) to prevent snow/blinding glare and protect against intense high-altitude UV exposure. -
Backpack (30–35L) + duffle bag (60–90L)
Daypack for water, layers, camera; a waterproof duffle for porter-carried gear. Use a pack cover or dry bag for extra protection. -
Four-season sleeping bag
Rated for extreme cold (comfort to at least −10°C or lower). Condensation and wind make a warm bag essential for high camps. -
Water bottles or hydration system (2–3 L)
Carry insulated bottles or an insulated sleeve to prevent freezing on summit night. Hydration is key to reduce altitude problems.
🧴 Accessories — Small Items That Make a Big Difference
Small, lightweight accessories have outsized impact on comfort, health and convenience while climbing Kilimanjaro.
- Sunscreen SPF 50+ — high altitude UV is stronger; apply frequently.
- Lip balm — SPF and moisture protect against windburn and cracking.
- Power bank — large capacity to charge cameras and phones; cold reduces battery efficiency.
- Toiletries — biodegradable soap, toothbrush, toothpaste, wet wipes, hand sanitizer.
- First aid kit — personal meds, blister care, pain relievers, bandages; guides carry emergency kits and oxygen.
- Camera / GoPro — capture trail forests, unique flora, glacier views and sunrise from Uhuru Peak.
🌤️ Best Time to Climb Kilimanjaro (2026–2027 Guide)
Kilimanjaro has two main dry seasons and two rainy seasons. Choosing the right window improves weather, visibility and summit success rates.
- January – March — cooler, less crowded, clear skies; ideal for photographers and quieter climbs.
- June – October — warm, dry and most popular. Considered the best overall time; July–September deliver excellent summit conditions.
- December — generally good weather and clear views; slightly colder than mid-year months.
- Avoid April, May & November — heavy rains make trails slippery, reduce visibility and lower summit success rates.
❓ Frequently Asked Questions (FAQs)
1. Is the 7-day climb enough for acclimatization?
Yes. A well-planned 7-day itinerary (routes like Machame, Lemosho, Rongai) gives your body time to adapt and offers one of the highest summit success rates when combined with proper hydration and 'climb high, sleep low' tactics.
2. Do I need prior mountaineering experience?
No technical climbing skills are required. Kilimanjaro is a high-altitude trek rather than a technical climb. Good cardiovascular fitness, endurance training and preparation are the most important factors.
3. How cold does it get at the summit?
Expect temperatures between −10°C and −20°C before sunrise. Windchill can make it feel colder, so bring appropriate high-quality insulation and protective layers.
4. What is the food like on the mountain?
Meals are hot and energy-dense to fuel trekking: soups (pumpkin, vegetable, chicken), rice, pasta, potatoes, stews, eggs, pancakes and porridge for breakfast. Fresh fruit and snacks are provided when available.
- Soup & starters
- Carbohydrate mains: rice, pasta, potatoes
- Vegetables & occasional protein (chicken/legumes)
- Breakfasts: porridge, eggs, pancakes
5. Is altitude sickness common?
Mild altitude symptoms (headache, nausea, fatigue) are common. Guides monitor climbers daily and apply acclimatization strategies. Drinking water, pacing yourself, and notifying guides immediately if symptoms intensify are essential safety steps.
